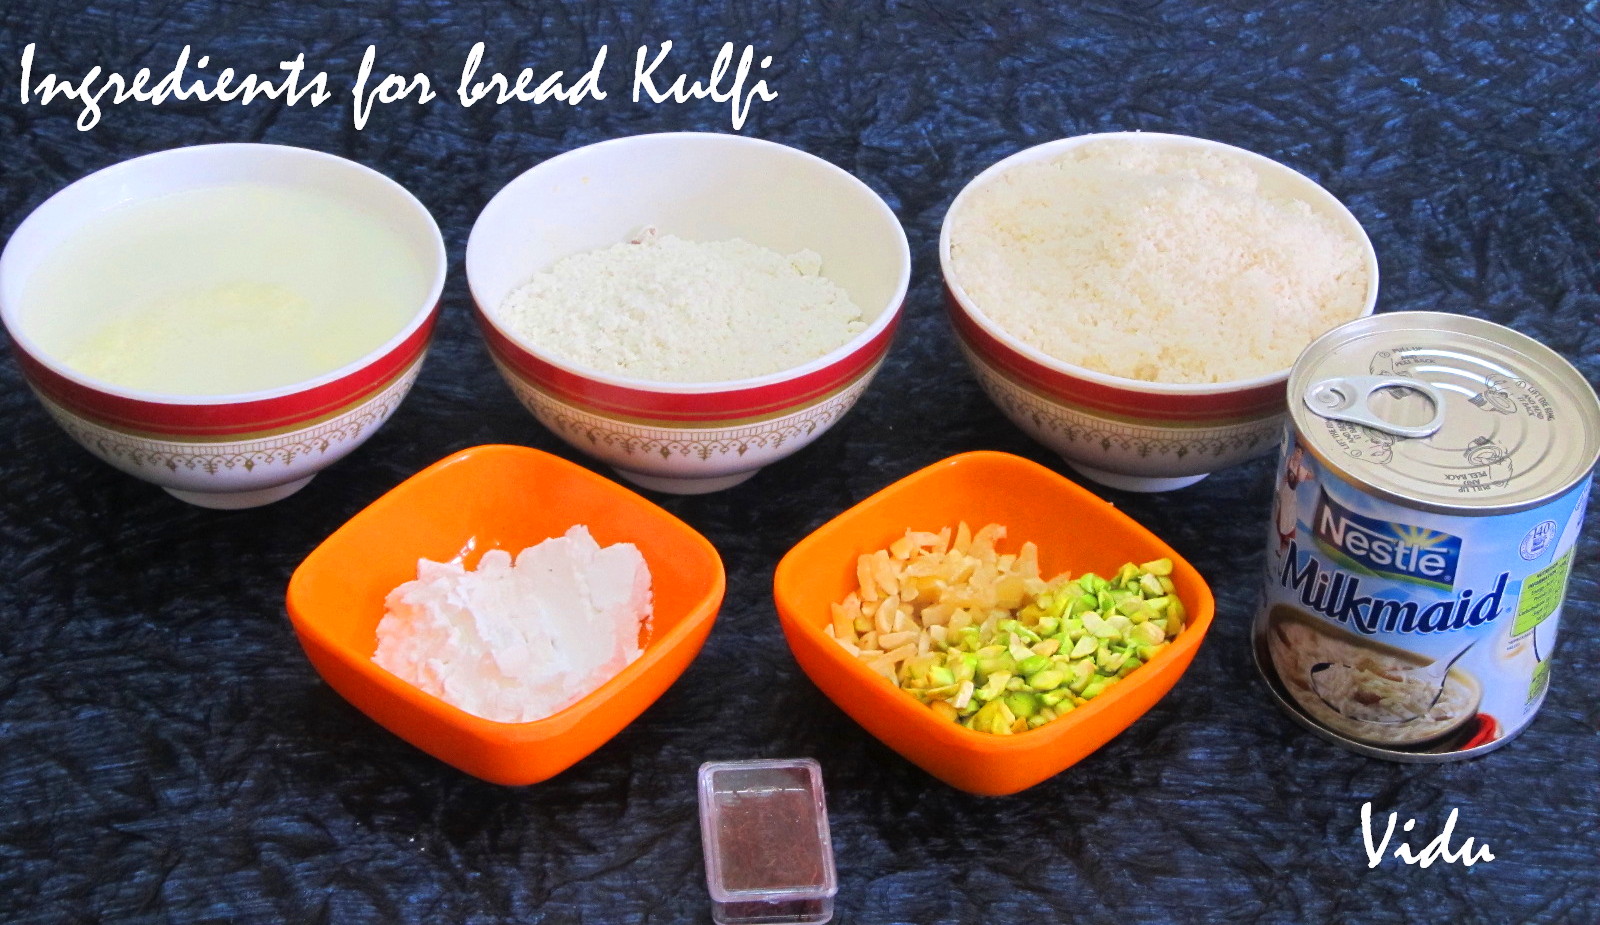
Thursday, March 29, 2012

Bread Kulfi

This is tried and true recipe out  from womens'era magazine this recipe is about 25 years old I can still remember mom preparing them for me and we still love it. very simple list of ingredients required...its no fuss recipe.
Excellent recipe for those who stock up excess bread at home we normally have a stock of fresh and stale bread at home always...:)
6-8 Slices Bread
1/2 Liter Milk
1 Tbsp Corn Starch
2 Tbsp Pistachios and Almond
5-6 Strands Saffron
1/2 Tin Condensed Milk
4 Tbsp Badam Milk Powder

First Step:
  • Earthen pots are used for kulfi.
  • I've show 3 different variations to set the kulfi.
  • If earthen pots are used it should be washed thoroughly and soaked in water for 24 hours before use. 

 Second Step:
  • Soak almonds and pista in lukewarm water soak till its easy to remove the skin.
  • Remove the outer skin and chop finely. 


Third Step:
  • Cut the edges of the bread and add to mixer jar grind and prepare pure white bread crumbs.  
Method:
  • In heavy bottom pan add milk and allow to boil on medium flame.
  • Add the condensed milk to the milk and keep stirring.


  • In a different bowl add the corn flour and badam milk powder and milk with little milk make sure there is no lumps.
  • Add the saffron strands to the boiling milk and keep stirring slowly add the corn starch mixture and keep stirring till the milk forms a custard consistency remove from flame and allow to cool. 
  • Add the bread crumbs to the mixer jar and add the half the custard to the bread crumbs and blend well till combined add the other half of the custard mixture blend again till well combined.
  • Distribute the mixture to either popsicle molds, bowl or earthen pot.
  • If earthen pot is used to set kulfi make sure to cover with foil and place in freezer to set.
  • It takes 4 to 5 hours to set.
  • Once the kulfi is set serve after lunch or dinner...enjoy...Happy Cooking...:)


Do watch the video demo...Enjoy...:)

Tuesday, March 20, 2012

Coconut Burfi

Everyone of us will always relate to childhood days once we see coconut burfi...it was such a treat for me as a kid mom always used to make a very large batch of these burfi during summer vacation nowadays we never make sweets at home totally stopped eating sweets for a long long time :(  one of my best friends from orrisa is visiting me this week and i wanted to surprise him with burfi and other sweets...and planned to post my recipe for coconut burfi...do try this recipe friends...:)
Its dads job to break the coconut in my house i will always depend on him to break a coconut i dunno why:D


Since we stay in a apartment these days we dont have a regular stone to break the coconut dad the genius found this coconut chipper in the market and yes he is the only one in the family knows how to handle it...:D

  • After breaking the coconut you can either use a scraper to grate the coconut or a simple method to remove the husk is to cut the coconut into chunks as usual and with the help of a potato peeler peel out the outer brown thin skin this way its very easy to prepare pure white shredded coconut.
  • Rinse the coconut twice in water before adding to mixerjar.
  • Add the coconut in to a small coffee grinder and pulse for 3 to 4 times this will give great results and we have perfect grated coconut.
Ingredients:
1 Cup Grated Coconut
1 Cup Sugar
1 Tbsp Ghee
1/4 Tsp Cardamom Powder
Pinch of Salt

Method:
  •  In a heavy bottom wok add the grated coconut and sugar combine the sugar and coconut.
  • Allow the coconut and sugar mixture to rest for 1 hour before preparing.
  • After an hour the coconut and sugar have combined thoroughly the sugar has melted and ready to be cooked.
This process is very important to follow if you like your burfi to be perfect white in color.
  • Before placing the burfi on fire apply very little ghee on a plate and set aside.
  • Place the wok on the fire and constantly keep stirring the mixture on medium flame add ghee, cardamom powder and salt stir and combine all the ingredients.
  • Once the coconut mixture combines and leaves the sides of the wok remove from flame.
  • Spread the coconut burfi in the greased plate.
  • Cut into desired shapes and serve with love...Happy Cooking...:)
Do watch my demo video enjoy...:)

Wednesday, March 7, 2012

Chocolate Chip Icecream

 March 5th being my birthday i prepared this chocolate chip icecream my family and friends loved this recipe its very simple and no fuss recipe do follow the steps and prepare the recipe your self...:)
1 Liter full fat Milk
1 Cup Sugar
1 Cup Chocolate chips
4 Tbsp Corn Flour
4 Tbsp Unsweetened Coco Powder
2 Tbsp Gelatin
2 Tbsp Liquid Glucose
500 ML Heavy Whipping Cream
Method:
  • In a heavy bottom pot add milk and sugar bring to rapid boil on medium flame.

  • In a bowl add the cocopowder and the cornflour add water and mix till there are no lumps.
  • To the 2 tbsp of gelatin add 1/2 cup water and allow to soak for 10 minutes.
  • Once the gelatin has soaked for 10 minutes place in microwave for 30seconds and melt.

  •  Place the liquid glucose in the microwave for 30 seconds and melt.
  • Add the chocolate mixture to the boiling milk and stir constantly till combined.
  • Add the gelatin and the glucose and stir.
  • Once you see the chocolate custard coat back of the spoon remove from flame and allow to cool in room temperature.
  • In a large bowl add the heavy whipping cream and whisk till soft peaks are formed.
  • Add the cooled custard and whisk the cream till combined.
  • Divide the chocolate chips in 2 batches and one batch of chips to the cream and mix well add the second batch of chocolate on top mix a little.
  • Place a cling film or a plate on the bowl allow the mixture to set over night in the freezer.
  • Once the mixture is set your ice cream is ready to serve...scoop the icecream  garnish with wafer and serve right away...Serve with loads of love...Enjoy...:)
Do watch my video demo in english...Enjoy....:)

Monday, March 5, 2012

Chocolate Truffles

This is a virtual treat for my best friends from facebook and youtube Veena nair and Sivaranjani Bharath both girls have been following my blog and recipes for a very long time thank you both wishing you and your family all the best....?

This is a very simple recipe I've already done rumballs recipe its the same but I've avoided sugar and additional flavor...

All we need is 3 Cups good quality dark chocolate chips 1/2 Cup Heavy whipping cream with 20% sweet 1/2 Cup sweetened desiccated coconut.

In a double boiler combine the chocolate chips and cream gently stir and melt the chocolate once melted and combined remove from double boil and allow to cool. scoop small portions of the chocolate and create your desire shape roll out the truffles in chocolate powder or sweetened coconut...serve with love...enjoy...:)

Saturday, March 3, 2012

Falooda

During summer falooda is a hit at my home its easy to prepare if the ingredients are easily available complete meal by itself  feels so filling and refreshing.
1 Packet Falooda Sev
1 Packet Strawberry Jello
3 Scoops Rose or Vanilla Ice cream
1 Tbsp Bail Seeds
2 Glasses Rose Milk
Fruits, Mixed Nuts and Cherry

  • To prepare falooda sev boil 3 cups of water cut the sev  into small pieces and add to boiling.
  • Once the sev is cooked drain and reserve in a bowl.

Falooda sev is prepared out of corn starch it takes bit of time to cook do follow the package directions before preparing the sev. it is easily available in the market.
  • In one cup of water add 1tbsp of basil seeds allow to double in volume before preparing the falooda.

  • I prepared 150 grams strawberry jello as per package directions 
  • Add fruits to falooda are optional the fruits i used are water melon, musk melon, apples and banana.
  1. Using a tall tumbler assemble the falooda.
  2. For the first layer add fruits.
  3. Second layer add jello.
  4. Third layer add falooda sev.
  5. Fourth layer add falooda seeds
  6. Fill the tumbler with rose milk leaving bit of space to add ice cream.
  7. Top with ice cream, nuts and decorate with cherry.
Serve right away enjoy...:)

Do watch my video demo in English...Enjoy...:)

Thursday, March 1, 2012

Rose Milk Icecream

Ummm...Yummy Yum Yum...I love to cook and also love watching other people cook and follow a few people who can cook up some wonders...:D following a trail of food bloggers i met a young and handsome cook from Hyderabad he is a Building contractor  by profession and always loves to experiment in his kitchen and wishes to open his own restaurant and serve people his creations isn't a wonderful idea...wishing Cherukuri Prasad all the best of luck on his dream venture. One day prasad posted rose ice cream which i love and have enjoyed eating rose icecream as a kid i wanted to feature prasads recipe first then when i spoke to him on a call he told me to just use whipping cream and rose syrup which turned out super and exactly like rose icecream from my childhood if you want to prepare prasads version on rose milk ice cream please Click Here for the recipe in detail...:)  
1/2 Liter Heavy Whipping Cream
1/4 Cup Rose Syrup
Cherry and Tutti fruity for garnish
  • If you cant find rose syrup in your country you may substitute with 2 to 4 tbsp rose water and red food color.
  • I've also used 20% sweetened heavy whipping cream and the rose syrup also contains sugar so I've avoided using sugar for this recipe it turned out perfect and we liked it if you want to add sugar you may add extra sugar.
  • Use frozen whipping cream its fast and easy to prepare add the frozen heavy whipping cream to a large bowl.
  • Using a electric beater beat the heavy whipping cream till it doubles in volume and forms soft peaks.
  • Add 1/4 cup of rose syrup and blend one last time till the rose syrup is incorporated well in the heavy whipping cream.
At the same time dont blend to much or the cream will turn into butter once you can see soft peaks forming avoid whipping more just add rose syrup and blend a bit.

  • Cover the bowl with a cling flim or plate and freeze the icecream over night till its set...:)
  • Scoop the ice cream in a bowl garnish with tutti fruity and cherry serve with love and enjoy...:)
Do watch my video demo recipe in english...Enjoy...:)